
first off i am so beyond amazed at your answers from yesterday's post. thank you for your honesty and thank you for kind words on mine!
second,i am beyond tickled to introduce my guest blogger of the day. ever heard of the blog i am momma hear me roar? cheri is cute, cheri is nice...but cheri most definitely is making herself known as someone who can hold her own in the crafting blogworld. she's got some of the ca-utest little boys she calls her sons, and she's got ca-utely awesome ideas to go along with these little boys. cheri was just recently featured on the ever so awesome and super cool site OHDEEDOH you can read more about her cute self there. so enough of my rambling...here's cheri!
Hello V and Co fans! I am thrilled to be here today. I love this blog!!! I am Cheri of I Am Momma - Hear Me Roar. I am the mother of two boys, so naturally I make a lot of boy-oriented stuff. Today we're going to be making this manly tee.second,i am beyond tickled to introduce my guest blogger of the day. ever heard of the blog i am momma hear me roar? cheri is cute, cheri is nice...but cheri most definitely is making herself known as someone who can hold her own in the crafting blogworld. she's got some of the ca-utest little boys she calls her sons, and she's got ca-utely awesome ideas to go along with these little boys. cheri was just recently featured on the ever so awesome and super cool site OHDEEDOH you can read more about her cute self there. so enough of my rambling...here's cheri!

You'll need a blank t-shirt, a clorox bleach pen, some scrap fabric, and some coordinating embroidery floss. Here we go!

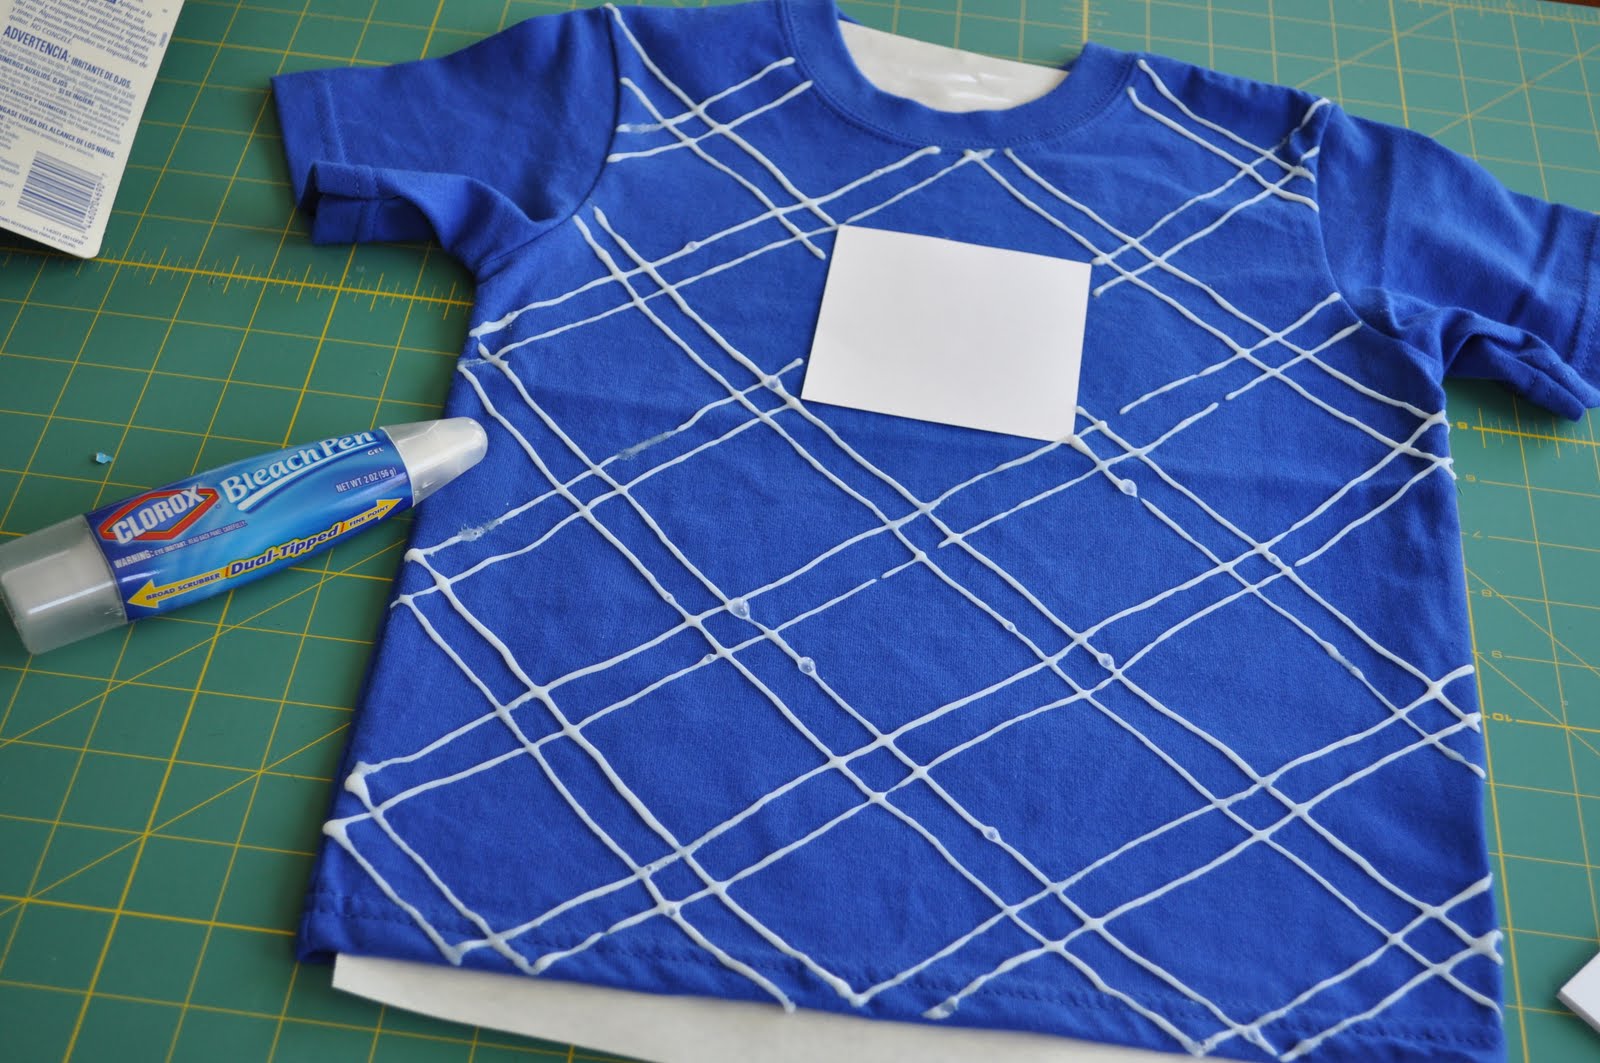
1) Lay out your t-shirt. Place thick paper between the layers of the shirt, so the bleach won't bleed through. I put a small square-shaped piece of paper in the center, to make sure I left some open space for the main design. It's just sitting there - not attached.
2) Draw your plaid lines with a bleach pen and wait until it's the color you want it to be. Before you go crazy with your bleach pen, you might want to watch THIS TUTORIAL for all the info you need to know. Rinse the shirt in the sink to remove the bleach and then throw it into the laundry. Eat some chocolate and surf the net while you're waiting. (I recommend a Skor bar and some good 'ol craft blogs.)
3) Create your design for the middle. I wanted to do an "H" like the Hurley one since that's what our last name starts with. (That way the shirt can be handed down, too. It's not just for one kid.) I always use heat 'n bond when applying a knit fabric to a knit fabric. Iron the heat 'n bond onto the scrap fabric. Draw and cut out the shape. Iron it onto the shirt. I also stitched around it on my machine.

4) Don't forget to floss! Embroidery floss is one of my favorite embellishments for boys' clothing. I hand stitched between the bleach lines to add more interest. I did every other line and used green floss to match the "H" (though it doesn't look super green in this picture).

5) Bribe your child with ridiculous amounts of candy so that he'll let you take his picture.


That's it! Feel free to e-mail me with any questions (but watch the bleach pen tutorial first). Come stop over at my place anytime. Thanks so much for having me! - Cheri
cheri thanks so much for the tutorial! i've got a few ideas rolling around in my head with this!
make sure you pay a visit to her wonderful blog! oh and check out her headbands. to.die.for.
we'll talk soon!
;)

22 comments:
Wonderful!!!! i love this idea... its so cute!!!
That is just tooo cute!!
Really cute idea.
Brilliant idea - thankyou for the post and the inspiration - I never knew that you could get bleach pens!
How adorable! I'm in. Ready set go.
Cute! I have such a hard time finding cute boy crafts. Love this one!
That is SUCH a great idea! So cute!
Super cool idea!
ooh my goodness! I love this shirt- I might try doing one with a '3' for my little man's birthday! :)
so cute!
love this! great boy project. :)
we have a Friday Fun Finds party (on Fridays, of course)... we'd love it if you'd link up this week!
yea for more cute boy-ware! :)
fab shirt!! I need to make one of these!
LOve this one! Your video tute is perfect.... going to have to give this a try!
I do resist dying (oops, I once did a Show and Tell about me dyeing and looked up to see 1/2 the people out there crying!)I guess that means they love me!
And if you go to the pool supply store, or Lowes' or Home Depot, you can find the stuff that de-clorines the pool. This is what I use as a stop bath for bleach resists.
Very sure and way easier.
By the way, I am allergic to bleach so I love the bleach pens!
glen/QuiltSwissy
Did you do the back as well?
Nope, I liked it just on the front. It would be cute to just sew on a little "H" in the center-top area, though. Hmmm...maybe I'll do that!
Cheri makes the best boys' shirts! I love the way you employ the different techniques for such a unique look.
Very, very fun shirt for the little boy's in our lives! Thank you for sharing!
This is so, so, so cute & seems so easy! However, I'm sure I'd be a hot mess with that bleach pen! Bahaha!
It is such a clever idea. I love it! :) I should try and make one for my little guy. Thanks for sharing!
Adin B
http://itssewtasticmama.blogspot.com/
Impressive. Just a few lines and a huge H..and things look really different and cute. Such a fortunate lad...to have a mom like you! :)
Post a Comment