Showing posts with label tutorials. Show all posts

Monday, January 11, 2016

V and Co: how to's for Valentines day


Well another year is upon us and I'm up to my eyeballs already and it's only the second week in January. I guess that's just the way it goes right? Well, with January already well on it's way we need to do a round up of our next holiday: VALENTINES DAY! 


I wanted to highlight one of my quilts from the Simply Color: Red book this one is called Queen of Hearts. It now lives permanently on the end of my daughter's bed, she's kind of obsessed with it so I let her have it after all the books were done. For pictures though we placed it on the chair and she wanted to be in the picture with Judgy Cat so I said sure…and this is what we got. :) Glad she loves it. And glad the cat loves her just as much as being on the quilt itself.

And well here's a few of the past tutorials and such things I've done celebrating February!


I heart you quilt 


Reverse applique pleated heart

 Ombre painted heart tote

Heart french knot pincushion

Rice hand warmers

Pink bloom appliqué bag

Now if you don't mind me off to the daily grind. On the horizon should be a couple of new patterns in the SHOP and also continue to patiently wait for the V and Co ombre. (by the end of January!!)

Friday, December 11, 2015

V and Co Christmas projects and mint fudge round up

 I thought I would round up a few of my past free tutorials here all in one spot. And of course add the whole awesome and easy 3 ingredient 3 minute mint fudge.
So for now here are a few past V and Co how to's


And then of course the awesome easy teacher gift you can make in like 5 minutes!
talk to ya soon. :) 

Monday, September 14, 2015

V and Co: How to make a little string block pincushion

One thing is for sure, you can never have enough pin cushions. Okay maybe you can and I just lied, whatever the case, you can't have enough CUTE pincushions. Am I right? Yep, thought so.
This little guy finishes at 4" x 4" and uses up any of those favorite little scraps you have left behind from a project. 
For this particular pincushion I used Amanda Jean's- Crazy Mom Quilts- new fabric line called Good Neighbors.
Materials Needed:
- scraps of material to make 1/2" strips 
- 1 white square with measurements of 5"x5"
- 1 charm square (5" x 5") for the back of the pincushion.
1. Cut the white square into 4- 2 1/2" squares. 
2. Cut scraps into strips with the width of 1/2" and with enough length to reach across diagonally from point to point of your 2 1/2" square.
 3. Place your first strip with right side facing up diagonally on your square.
4. Place a second strip directly on top of the first strip with wrong side facing up (and right sides together)
5. There's no way we can do a 1/4" seam so use 1/8" or less to sew your strips together (we want this to look scrappy and not perfect so sometimes use 1/8" seam and other times use less, this way you can achieve this not perfect look)

6. Press open with an iron.


7. Repeat on the second strip
8. Continue until you get close to the corner. Find a slightly larger piece of scrap fabric and continue to place right sides together for the last time making sure it covers all of the corner.
9. Flip the block around so you can start sewing more strips onto the other side, starting with your very first middle strip again. Repeat what you did on the first side to this new side.
10. You should end up with this mess of a thing. Don't worry we will make it pretty next.

11. Flip over your sewn block, and align your foundation block to 2 1/2" on the square ruler
 12. Trim off the excess strips
13. Flip around the block and again align and square up to the 2 1/2" mark and trim off excess strips
 14. Turn it over you now have a perfect 2 1/2" string block.
 15. Make three more to make 4 total string blocks
16. With right sides together sew the top two squares together and then repeat on the bottom two squares.
17. With right sides together sew the two top squares to the two bottom squares to create a 4 1/2" block
 18. Square down your back fabric (charm square) to 4 1/2" place right sides together and using 1/4" sew around all four sides leaving an opening on one side to be able to pull inside out and fill with filling.
**(What you put inside is up to you, you can do crushed clams, sand, seeds, and so forth. These are just a few options! I went with seeds.)
19. Hand stitch close your side opening.

Enjoy your cute pincushion!
And now:
Winner of our charm pack giveaway is:
Vicki H!
We'll talk soon!

Monday, December 8, 2014

EasyTeacher Gift

 These days life is fast. Between band, swimming, orchestra, and writing books, and all other things (I'm stopping with that because I'm getting tired just by writing it) there hasn't been much time for about anything other than a fast craft here a fast craft there, spend time with family and then do it all over again. So this is right up my alley on fast quick get it done and off the to do list and we get to give our teachers (who deserve a freaking award and chocolate cake to go with said award) a nice home made gift that literally took me like less than 5 minutes to make (the tote bag, the zipper bag only took like 20 because I can make it in my sleep because I make them all the time)

So here's how to make a super simple tote that will take less than 5 minutes to make. I've seen bags like this done with embroidery floss and those are super cute! But takes more time than i have…sooooo enter our super fast version:

materials needed:
 -Bag from Walmart ($2.96) or Joanns has them as well and you can buy a 3 pack on Amazon if you have multiple teachers you want to make bags for.

-FABRIC PENS from joann's are like $6 or on  Amazon  (wow, those are priced more than joann's! Go to Joann's people)

-Ruler, washable pen or pencil


On the bag I went off the outside part of the handle and drew a red line down. (or you can make dashes like it was done on the header picture)

Next I marked with the blue pen every 2" and then proceeded to draw line the dashed line with my ruler as my guide.
-Next with the washable pen (or pencil) I lightly wrote the name in cursive so I could make sure I liked the placement if I didn't then I could erase the pen with lightly damping the fabric.
*note: the fabric pen will run if you wet the fabric right after you draw on the canvas. Let the marker air dry and let it set before you try to remove the erasable marker. And when you do just lightly dab.
-Lastly draw on top of your temporary written name.
DONE!!!!

Have a little bit of time? You can make a fun little extra by using my Color block zipper pouch pattern and embellishing it a little!
-Make the zipper pouch just like the instructions in the pattern, I used Moda's ruler fabric. (I believe the fabric is called potluck by Sandy Klop. :) 
-Measure 2" from the left side, and draw a dashed line in red, then measure down every 1" and make a marking with the blue marker. This will be your guide for the blue dashed lines. 
-Mark just like you did on the canvas bag the name of the teacher. 
-Drawn on top of temporary marked name. 
Totally awesome gift for your awesome teacher. In no time! :) 

Monday, April 7, 2014

V and Co: how to make: Bias tape with out a bias tape maker and a fabric banner with the slice precut


Well, with warmer weather flirting with us and promising that it's going to come and stay here for longer than just one day with a high of 65 degrees, and with the arrival of color me happy finally making it to stores, here's a fun little project for you to spruce up your outside parties and celebrations. 


I know what you're thinking...uhhh Vanessa, theres like a whole army of tutorials on how to make fabric banners...
YEAH I KNOW PEOPLE, but listen...I'm using a new pre-cut that Moda introduced last fall. It's called the Slice. And there are some great free patterns already out there for these...so I'm adding my little bit of flair to the cause. 

This pre-cut is available in many fabric lines, look for it! Here I'll be using my newest fabric line "Color Me Happy" this particular precut can be found here.

 Okay, ready to get started?
Here's what you'll need:
1 color me happy slice

2 - 4: 2"xWOF strips of fabric. (we are making the bias tape..but not on the bias)
 Depending on how long you want your banner to be will determine the number of strips of fabric you will need. 1 strip will be approx.  44", two 88" and so forth. For this tutorial lets just say 3 strips to make it 132" long (because I wanted to use more of my slice precut!)

Making the Bias Tape:
Okay so first things first, to make the bias tape we will sew end to end your three 2" strips. I wanted the strips to be connected as if they were on the bias so this is how I sewed my strips together:
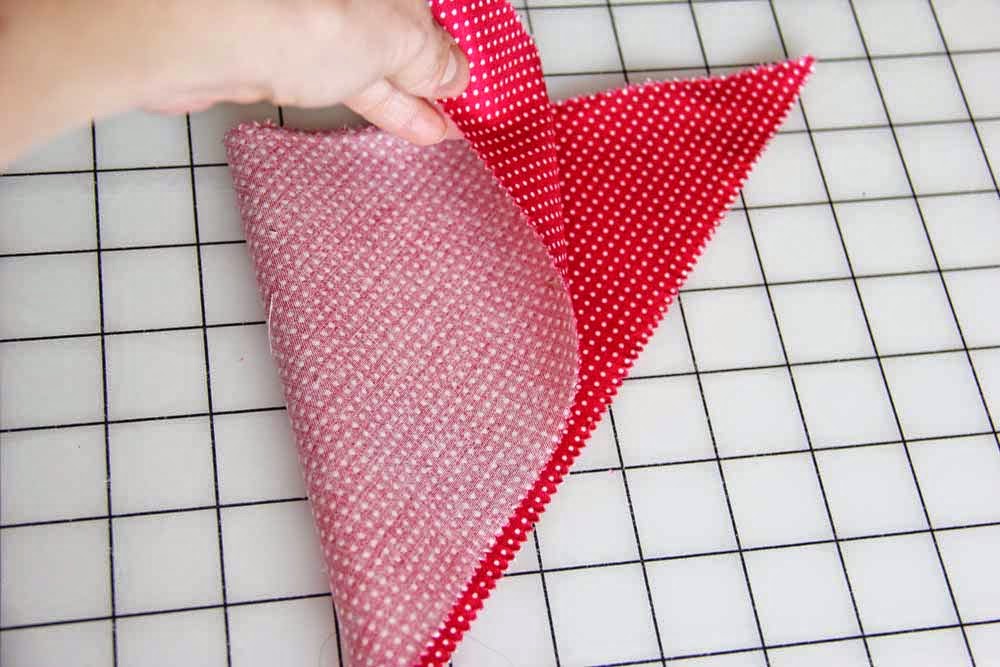
 With right sides together I placed two strips just as I show in the picture, making sure there is at least 1/4" over lap of each strip.
 Sew diagonally starting where the edges meet at the top (if you need to, draw a line diagonally from one side of where the edges meet to the opposite side of where the edges meet and sew on the drawn line )
Continue to sew all the way to the other side.
Do this again to the next strip to attach.
*tip: Place washi tape to guide you (place the washi tape edge directly down from where needle goes down into the fabric and keep where the fabric edges meet directly on that washi edge like the picture shows)

Next:
Once your strips are all sewn together to make one long strip, we will be folding in the edges to finish up the bias tape.
This way that i'll be showing you might be a little different than you are used to. I learned this method from a seasoned quilter on how to "make do" if you don't have a bias tape maker big enough for what you need:
 there are bias tape makers out there that are big enough for this project, but if you don't have one (like me!) then this will do just fine.
here we show a couple of bias tape makers. both too small for what I need. So I will use an extra long pin as my bias tape maker:
With my ruler and pin in hand, I laid down the ruler on the ironing board and pinned in at the 1 1/4'' mark to the end of the ruler. Creating a gap or 1 1/4"
Next I folded in the edges of the fabric and stuffed no wait gently placed in through the gap.
press this end down with an iron the start of your bias tape.
Gently pull through your strip and watch as the edges fold in.

As you pull through press (if you are right handed like I am I pull the strip towards my left. That way I can pull the strip with my left hand and iron with my right.)

*tip: make sure that your folded edges stay even, just check them and re-adjust if you need to. 

Making the Pendants:
 Open  your Slice precut of Color Me Happy.
There's no cutting involved, that's what makes this so great!
 Fold in half with right sides together
 We will be sewing the one short side and leaving the long side open.
 Using a 1/4" seam sew the short side, starting and finishing with a back stitch.
 Turn inside out and press with an iron.
The open side will be nestled into your bias tape so that doesn't need to be sewn.
Fold in 1/4" in one end of your bias tape to make a finished edge, then fold back down and top stitch for about 12" without placing a pendant. 
after the 12" place your first pendant nestled in between your folded bias tape. Sew with a top stitch across the bias tape with the pendant in it. Continue until you have around 12" left of your bias tape left. Finish by top stitching and then folding in the edge 1/4" for a finished edge.

Banner done!
Now here's hoping for some even nicer than 50 degrees weather on a consistent time frame!
we'll talk soon!
follow V and Co on Instagram and Facebook
Blog Widget by LinkWithin