Monday, March 29, 2010

i love getting emails with pictures and links of things you've made with my tutorials.
kayleen made these balls using my fabric balls pattern.
i think they turned out gorgeous. and her photography. lovely.

and i love getting emails with links of things you have been working NOT using my tutorials.


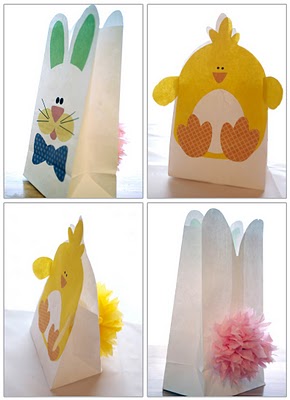
like these lovely free downloadable print outs that amy over at green lily designs sent me.
one thing is for sure you guys are a creative bunch.
so i decided that i'm going to do something here.
because my inbox gets super flooded with lots of different things. i'm going to host a link post come this friday, where you can toot your own horn, if you will, of things you've made using my tutorials OR just something you made using someone elses tutorials, OR a link to a tutorial YOU made.
sound like fun?
yeah i thought so.

so get your creative juices going and lets make some stuff!
oh and grab your featured button if you've ever been featured on my blog!
(right click save and then link back to v and co!)
we'll talk soon!

v and co loves her sponsors! check out this necklace that i love to have around my neck by lisa leonard design!

Friday, March 26, 2010

what i've been working on...

so on top of sewing new curtains for my home...
the community council and i have been sewing this quilt. all the fabric was donated and we made it in like two nights. then we had a fabulous friend (hi f!) quilt it for us and then another wonderful friend (hi lori!) and i sat and watched "sweet home alabama" and bound it. all in a matter of days.
we made it because it's our on going effort to raise money for the school's new playground. like i mentioned before, our elementary school doesn't have play ground equipment that is up to code for school standards, most of it has been there long enough for 60 and 70 year olds to remember playing on it.

we know it's going to take years to get enough money this way but every little bit counts and we will continue our efforts in raising the funds to get those kids some new stuff.
the community has been so great and many business's have offered free services and home made items (one being this quilt made by us, and the other a crochet rug).
it's times like these that makes me so proud to be part of this close knit area.
mighty darn proud.
we as moms to some of the kids that go to this school love this school and want to do anything we can to help it.
we're all working really hard to find and apply to as many grant programs we can to see if one of them will pick us to help us with the funds.
we shall see how this all plays out in time.
we shall see.
i've also been celebrating my 12 year anniversary. this last weekend the husband gave the me the BEST present ever, he gave me a full saturday of hard core cleaning of the whole house (lets just say tooth brushes were involved and baseboards, under the beds, and the freezers were not overlooked). we as a family worked on getting rid of skid marks in the toilets, dusting the cobwebs, and vacuuming dust bunnies.
i had one full day on sunday (our actual anniversary) of a completely clean and organized house. well, minus one closet...which just so happens to be my closet. and one that i call my "monica closet" i clean it out once a year. and right now is not that time of the year.

we also bought and we watched that stupid vampire movie with the awesome werewolf's who i should not be drooling over because they are so young. twilight's sequel "new moon."
lastly, i got to organize my own little personal creating space. and even though the fabric's not all lined up pretty and "gap-ish" (yeah, i worked there for the holiday season one year in high school, just for the discount...didn't make one dime and i still associate the "santa baby", and "this christmas" (by wham) songs with gap every time i hear them. good.times.) it is much better than what it was a week ago.
when this spot is organized all is well in my world. :)
wow a little wordy today aren't i?

so... you guys have been busy too!
emails, flicker pictures, and blog posts made with v and co tuts! nice!
next week i'll show off some of the stuff you've been doing!

have a fantabulous weekend!
oh and here's a couple more of V and Co tuts for easter-ish kind of things!
fabric covered eggs and
fabric easter basket
we'll talk soon.
;)

v and co loves her sponsors! check out this adorable little skirt from forever you

Wednesday, March 24, 2010

want an amazing deal


so simply utah is spotlighting me.
they are super sweet and the spotlight some pretty amazing shops.
i'm honored and humbled to be numbered as one of them.
and well because they were so nice...i'm offering for the rest of this week only, 25% off your order. just mention "simply utah" on your notes of your order and i will refund you 25%.

uh yeah. you'll want to take advantage of that...cause i'm not going to do that often!
so if you haven't bought that pattern you wanted yet...do it now.
if you want some fabric and want a good deal on it...do it now.

want to take advantage? CLICK HERE TO START SHOPPING
we'll talk soon!

what $10 and a mid life decorating crisis will do to ya

so a couple weeks ago things got a little ugly.
let me explain:
it was 2:45 pm on a thursday afternoon and for some reason i passed my living room and thought. "UGH! i love my new to me couch...but it's not meshing in like it should."

so i thought "maybe if i move a few things here and there it might mesh better."
well it started innocently enough. a frame here. a decoration there. then it got nasty.
the furniture was being moved, and the wall hangings came down.
all.of.them.
and the decor, heaped into a sad pile in the corner.
by the time 5 pm rolled around and the husband walked through the door, i was a crying mess in a room with nothing on the walls and all the furniture moved to the middle of it.
he walked right past me not wanting to touch that with a 10 foot pole. smart man.
i went to bed feeling defeated and lost.
the next day i had a friend come over and help me put all the furniture back where it originally was (minus a few things here and there). but i didn't put back any of the wall hangings up.
and i was okay with that.
time for change again.
i need new things. but i don't necessarily have money to re-decorate everything in that room. and oh yeah wasn't i suppose to be focusing on the boy's room?

so next time i had to go to the box store...i set off to home depot as well. (we just got one a few years ago.)
"i need curtains!" i said. and well you know me. i don't just go and buy curtains...so i bought a two pack of drop cloths for less than $10. and because the two drop cloths were pretty big i cut each of them in half.
thus being able to make two sets of curtains for under $10.
yup, my new living room curtains (and soon to also be new boys' bedroom curtains) cost me aprox $4.50 ish per set.

and i'm going to "try" to make some art for my bare walls.
a little more pottery barnish. slash V and Co ish.
are you ready for a new adventure?
i may just fall flat on my face. but at least you'll know Not to do it if i do.
we'll talk soon!

v and co loves her sponsors check out the awesome thumb guard to help little ones stop the thumb sucking habit at kid giddy!
also please check out these corner tv stands

Monday, March 22, 2010

guest tutorial blogger: Dana of MADE

well this gal doesn't really need an introduction.
but i'll do one anyways.
it was last "end of summer" i think, when i contacted dana because i became obsessed with her shirt dress refashion. she inspired me to make katie's skirt dress refashion. and well, since then, we've had countless of emails back and forth (sometimes at 2 and 3 in the morning) been on the phone a few times, have competed (and i lost to) on SYTYC, and yes, (she already said it on her blog), have planned on going to a couple of conferences this year together.
she's amazing at refashion, and well pretty much anything she thinks up! not only that but her pictures are always something to look at. but i probably don't need to tell you that, 'cause you probably already know that for yourself. so i'll just shut up now and give the time over to dana!


Hello fellow V and Co-ers! (if that's we call ourselves?),
It's Dana from the site MADE. I'm happy to be Guesting on Vanessa's blog today! Something I love about Vanessa is her ability to make a home feel so inviting. All the pictures of her home make me want to step inside, have a bite to eat, and just hang out for a while (of course she'd be telling me some hilarious story while I lounged on her new leather couch).

So with that in mind, I thought a home decor project was the perfect thing to share. And since Easter is only TWO weeks away (what? How did that sneak up on us??)......
and if you're planning an Easter morning Brunch,
Don't forget the PEEPS!
Nothing says Easter like a bunch of colorful bunnies.
And since buntings are festive any time of the year, I took a spin on the traditional flag look and mimicked a childhood favorite in our family.....Marshmallow Peeps.
Pick your favorite Peeps color (or make up your own!) Find a similar FELT color at your local craft store.
And let's get bunting!

Skill Level: Any
Needed:
* 1/2 yard or less of felt (doesn't need to be anything fancy)
* brown fabric paint
* pencil (or other round object)
* ribbon/fabric for bunting
* sewing machine

First, cut out your pattern. I've created one here for you. If you don't have a printer, just put a piece of paper up to your computer screen and trace the image right on top!
or.....

You can copy the Bunny Bunting Pattern TWO ways:
1. Click on the image below to enlarge. Then "save as" to you computer. Open it in a Word doc and insert the picture so you can adjust the size for your needs.

2. Grab the PDF pic by clicking HERE.

Okay, with your bunny pattern printed and cut out (I usually print on paper and then trace/cut an additional pattern out of cardstock or from a file folder. MUCH easier to trace around a stiffer bunny over and over again).

Fold your felt in half (because each bunny is a double-layer). You can make them single layered if you want the cheap/easy way. But it's less polished looking and a bit see-through. So I recommend double-layers.
Then trace and cut out as many bunnies as you'd like. The pink bunting has 18 bunnies. The small yellow bunting has 9:
Time to decorate their faces. You'll only be decorating the front bunnies (the back bunnies are left plain). You'll need a pencil eraser or something round. And brown fabric paint. I prefer Tulip brand, Matte, Chocolate. Its cheap, $1.50 at most craft stores.
Dip your pencil eraser in the paint, and dab it right onto each bunny. The beauty of Peeps is that they're far from perfect. If you look at a box, each face is slightly different. So don't worry about being precise or even symmetrical!
Make sure you place a piece of paper under your bunny because paint may seep through to the back.
Starting to see a resemblance......?
Let your bunnies dry for a hour or longer. If you're antsy, you can speed up the process by drying them with a blow dryer, but be careful that they don't fly all over the place!

While you're waiting for the faces to dry, prep your bunting ribbon. You can use fabric, ribbon, rope, colorful twine (THIS stuff is totally cute). My favorite method for making "ribbon" is to cut strips of fabric (I used double-layered white muslin in this case), sew the strips together to make a very long strip, and then I serge the edges. Perfect for wrapping gifts and in this case, for making a bunting. Each finished "ribbon" is about 100 inches long but that was much longer than needed.
Time to sew on your bunnies.
If you want the quick and easy way, grab a bunny back and a bunny front and sew that double-layered bunny to your ribbon and keep on going till you're bunnied out.

But if you want the slightly longer method that I did (it only took a bit longer)...
I sewed each bunny back on to the ribbon while the faces were drying. Just lay one down and sew across the ears:
Then grab the next bunny back and repeat:
Sewing the backs on first makes the bunting a bit stronger, the bunnies are likely to be straighter, and it's more polished. And then you sew the Front Bunnies right on top.

Okay, okay...so I was just bored and couldn't wait to get started while those blasted faces were drying! Either method you use, your bunnies will look great.
Just sew all the way around and continue to the end.
and, you're done!
Enjoy your party!

For more ideas and Tutorials, please visit my blog MADE.
Thanks Vanessa. I love jumping into the V and Co. home!

well dana, you never disappoint that's for sure! thanks so much for being a part of my blog for the day and in showing us such an adorable bunting for easter!! yes please go check out her talent over at her blog!

we'll talk soon! ;)


hey check it! you can now buy fabric at V and Co's uptownjane!
Blog Widget by LinkWithin